Every now and then I post about various topics from the perspective of a designer in my “Designer Chatter” series. If you would like to submit a question or topic for a future post feel free to use my contact page. Are you a designer and want to weigh in on the topic? Link back here so others can join in!
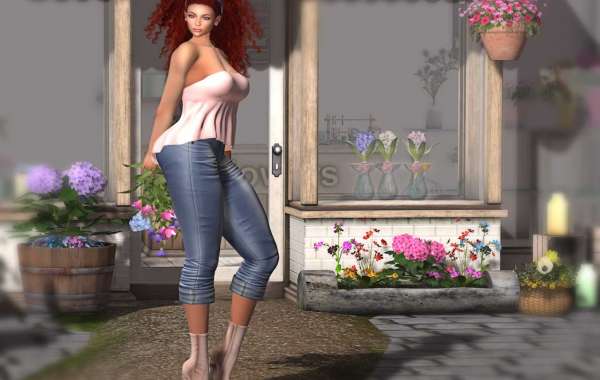
Today I was making the above photo and decided my next topic should be on how to make pretty Second Life photos. Who doesn't like that?
Hooo boy this is a big topic! There are so many great resources for how to setup your shot, lighting, and editing your final photo so I will be referring you to tons of links! I will try to cover the basics here, because it's simply too large a topic to cover in one blog post, but this should at least get you started. Keep in mind there are many different ways to do this, it really all comes down to what works for you. So try different things and learn as much as you can.
Disclaimer: I use Firestorm viewer and Photoshop, so my resources will mostly refer to these tools. I am also going to assume that you have already chosen what to wear and what will be in your background.
Setting Up Your Shot
The absolute number one first thing you must know is how to use your camera. The biggest mistake I see photographers make is the 'fish eye' effect in their close ups.


The left photo uses standard camera zoom which causes distortion. Notice how the face looks elongated and the lips, nose and eyes look big? The Right photo uses CTRL + 0 to zoom in and has no lens distortion. From zoomed out hold ATL and click on what you want your camera to focus on. Hit CTRL + 0 to zoom in till you're happy with it. Use CTRL + 8 to zoom out and CTRL + 9 to exit back to normal camera control.
- Taking high resolution "up close" portraits for Second Life by Daeberethwen Arbenlow: A good overview of how to get a nice close up shot
- A Beginner's guide to camera setup for Second Life photography by FOXCITY: a more advanced overview of how to get the right camera angle, zoom, focus, etc.
Lighting
Lighting is a huge topic, so I will be referring to several videos on this subject. They key points to understand are that lighting is what gives your picture depth and realism. It will add or remove shadows, highlight, shine, color and texture. The two main ways of manipulating lighting (in Second Life) is by changing your Windlights which changes the lighting for the entire world around you, or by using light boxes/projectors similar to how a real photographer would place real lights.
- Secondlife Windlight Lighting Setup Timeline by ᴋɪᴛᴛʏ {CowTea}: Goes through settings and lighting effects. No instruction, but you can follow along.
- Basic Dynamic Lighting with Light Boxes by Daeberethwen Arbenlow: Gives a good basic overview of how to use light boxes for amazing lighting effects.
- Creating and using light projectors with textures by Daeberethwen Arbenlow: Expands on the concepts in the above tutorial using projectors.
- A beginner's guide to projector effects in Second Life by FOXCITY: Another projectors tutorial
- Editing your windlight sky for custom lighting by Daeberethwen Arbenlow: Discusses how to customize your Windlight settings.
- How to take better pictures in secondlife by InkBoy: Introduces AnyPose but mostly goes through lighting settings.
- A beginner's guide to shadows for Second Life portrait photography by FOXCITY : Shows you how to set up your lighting for great shadows
- How to take a photo in second life with good quality - Firestorm Viewer by Selena Paine: A walkthrough of your graphics settings and Windlights used for a nice looking photo
- Creating dynamic light and shadow by combining images by Daeberethwen Arbenlow: This is a more advanced lighting and Photoshop tutorial if you want to challenge yourself. she uses multiple shots with differen Windlight settings and edits them in Photoshot to combine them.
- PT 1: Cynefin Projectors with Backlighting by cassie middles: Shows how to use the Cynefin Projection Lighting Kit which you can purchase here. I have not used this yet but it's an easy way to get into projection lighting.
Editing in Photoshop
So you've got your perfect raw shot, now what? Here is the before and after for the photo I did today. As you can see there is a lot of work you can do to enhance your photo and add various effects.

One of first thing I like to do is to work on enhancing the shadows and highlights of the photo. I use a little trick I picked up in a non Second Life tutorial a long time ago (unfortunately I cannot recall the video to link to, sorry). I add a new layer of pure medium gray and set it to overlay. I then use the dodge and burn tools on this layer to work in shadows and highlights. Next I add a clear layer and paint on some soft shadows with black and lower the opacity till I get the look I want. This allows me to edit the look without making changes to the raw photo. You can experiment with this to see if it works well for you. These tutorials use similar techniques for shadows and highlights:
- Adding shadows to Second Life photos in Photoshop by Daeberethwen Arbenlow: Some basic shadow techniques
- Highlights and Shadows with Dodge and Burn using Curves by Daeberethwen Arbenlow:
- A beginner's guide to natural skin shading in Photoshop by FOXCITY: Shows you how to shade skin by selecting certain areas, avoids your shading from blurring into other areas of the photo.
- Adding highlights using adjustment layers in Photoshop by Strawberry Singh: Uses adjustment layers to create beautiful highlights and shadows. This is another technique that does not edit the base photo.
Or you may want to add lense flair, sparkles, rian or other effects. These tutorials are really handy:
- Creating soft, colored lens flare effects by Daeberethwen Arbenlow
- Creating fire glow and other glow effects with photoshop by Daeberethwen Arbenlow
- Creating Rain Effects by Daeberethwen
Other Helpful Tutorials YouTubers
- Second Life Streaming - Photography Tips by Strawberry Singh : Gives a good basic overview of how to set up lighting, how to take high rez shots, etc.
- Natsumi Xenga on Youtube : Videos showing the entire editing process to create amazing photos. Great way to pick up some ideas and tricks
- Ashlee Rose on Youtube: Does lots of live stream and speed edits of SL photo editing
- Remove greenscreen, get rid of green in hair, add DoF background by Daeberethwen Arbenlow: For when you need to remove the background of your image. Useful for certain advanced editing or if you want to use a separate image for your background.
- SL Photography Walkthrough // Part 1 // INTROS by Anya Ohmai: this is the first in a series of videos showing and explaining the entire process for how she sets up, takes and edits her photos.
- SL Photography Quick Tips // Skin Shine by Anya Ohmai: Discusses how to use materials and lighting for glossy skin effects.
- The Lelutka Axis Hud Second Life by cassie middles: A very handy tool for manipulating your mesh head for custom expressions. I have used it on both Lelutka and Catwa. You can purchase it here.
- SL Photogrophy by cassie middles: A playlist of various videos showing how she sets up and edits her photos.
- A beginner's guide to filling in Second Life hair in Photoshop by FOXCITY: Shows you how to enhance hair by hand drawing over your avatar's hair for a more realistic look
Useful SL Tools
- Animare: Allows you to adjust your avatar's pose
- Lelutka Axis HUD: Gives you fine detailed control over your mesh head's expression and position. Works on other heads besides Leltuka. Try the demo if you're not sure.
- Broken Princess 3 Way Directional Lighting Effects: For just 1L this is a cheap way to try some projection lights out!
- Cynefin Projection Lighting Kit: I have not used this one yet but it's a lighting projector kit for those who are new to lighting or don't want to bother with the hassle of making them from scratch.
- FOXCITY. Skin FX - Volume I: Attachable lighting for easy lighting tweaks.
- FOXCITY. Skin FX - Volume II: Attachable lighting for easy lighting tweaks.I haven't used this one but I use Volume I a lot.
- FOXCITY. Spooky Projectors: Gives a spide, bat or web lighting effect.
- LUMIPro: Pricey, but some people swear by it. This is an advanced lighting HUD. You can find more info here.
- Fate Hand Poser: This is so crucial for me! I use this in almost every photo for my nail ads to fine tweek the fingers to where I need them.
- L'Etre Natural Mesh Eyelids: On most mesh heads your closed eyelids look really weird. These mesh eyelids fit over your closed eyes to give a more realistic look. I used them in today's demo photo above.
Handy Photoshop Resources
There are SO MANY great brushes, overlays, styles, gradients, etc. I could never list them all. Just be sure you are using resources with the correct licensing. So if you sell your photos or use them for ads be sure your resource is licensed for commercial work. If you just make photos for personal use then most resources should be right for you.
- Photoshop: There is a monthly cost, depending on the plan you use, but PS is the best program for graphics editing.
- GIMP: Can't afford PS? This is the next best thing. Harder to find resources for and not as powerful, but it can do a lot of the same basics as PS.
- Brusheeezy: Brushes, Photoshop Patterns, Textures, PSDs, Actions, Shapes, Styles, Gradients
- Obsidian Dawn: Mostly brushes but has some other resources and tutorials
- Brushes by Stephannie Valentin: Love her hair brushes, I use them all the time!
Hopefully this helps get your started on your journey to lovely photos. Good luck!
